

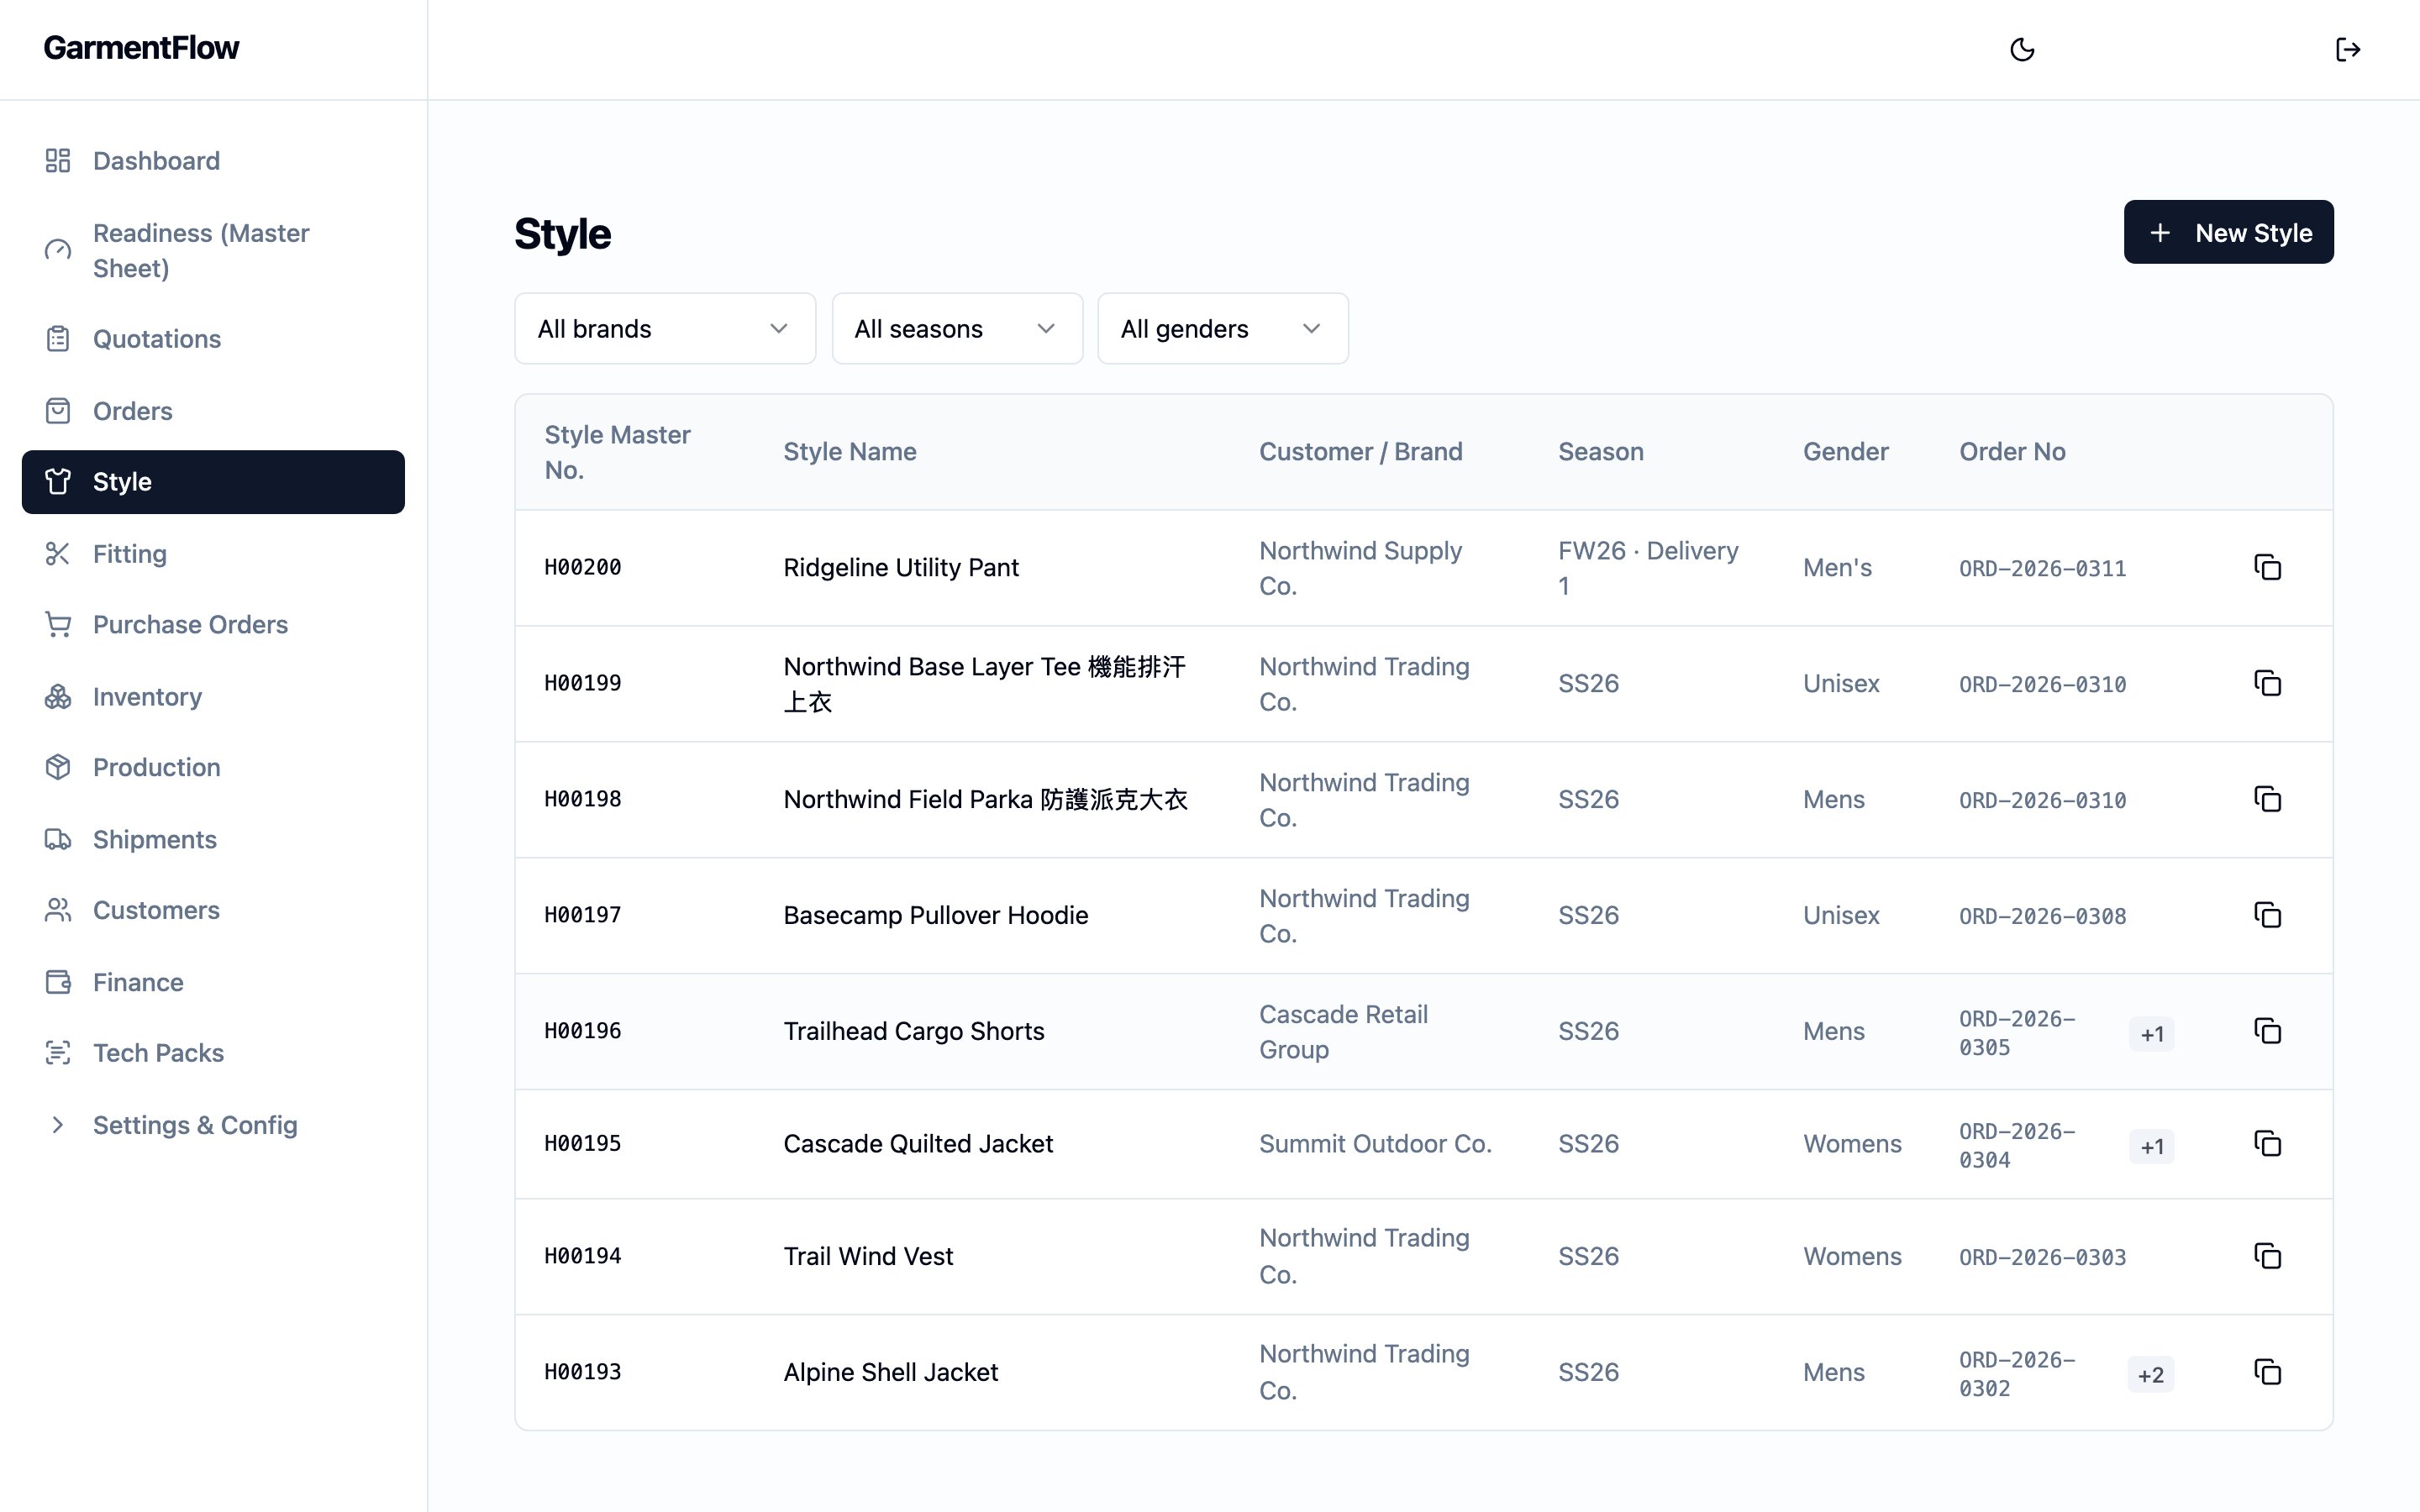
The Style module list — every reusable style record in the workspace, with the customer, season, gender, and any linked order at a glance.
What it is
A style is a tenant-level product record for a single apparel design — a men’s polo for SS27, a winter parka, a kids’ tee — kept in one place and reused across orders, seasons, and customers. The style carries the design’s commercial identity (its name, the the design was developed for, season, gender, , thumbnail) and owns the artifacts that define it: A style can be created by hand, from an order, or by injecting a tech pack a brand has sent — the injection path seeds the style’s identity, colorways, BOM, size specification, images, and QC checklist from the confirmed pack in one action.- its ,
- its ,
- its tech-pack files,
- and its other production artifacts: , packing, QC, and the cost-analysis view.
Why it exists
Apparel is a reuse business. A design sells across seasons and customers; the BOM and cost sheet built for it should travel with the design, not be rebuilt per order. The style is the place that holds the design’s identity and the artifacts that define it, so the work done once pays off every time the design is ordered again. It is also the place a reader, costing manager, or factory coordinator turns to find a design’s truth — its current BOM, its current price build-up, its history — without chasing it through orders.When it is used
- At design intake. Create a style when you start work on a new design.
- During development. Edit the style’s BOM, cost sheet, and tech-pack files as the design takes shape.
- At order entry. Link a style into the orders that sell it. One style supports many orders.
- In production. Manufacturing orders, factory orders, and packing and QC artifacts all reference the style.
- On reorder. Open the existing style instead of creating a new one — that’s the point of the model.
The canonical create path: master-first
The clean way to set a design up is master-first: open the Styles module, choose “Create style”, and fill in the style on its own. Link it to an order later, when there is one. This keeps the style reusable and lets you build the BOM and cost sheet without an order yet in the system.Alternative: from an order
If you are already inside an order that needs a brand-new design, you can open the style create form with that order pre-selected. The style is created the same way as master-first, and it appears in that order’s style line-up immediately so the order team can fill in the colors, sizes, and quantities for that order. For the order-side details, see the Orders module guide.Alternative: from a tech pack
If a brand has sent you a tech pack for a new design, upload it in Tech Packs, review the proposed identity, colorways, BOM, size specification, images, and QC checks on the review screen, and inject. The injection creates a working style with all of the pack’s confirmed content in one action — no re-key. See Import a tech pack. The Tech Packs capability is optional — your administrator may enable it on Feature settings, and it is available on certain plans.The style hero
Every style carries a single hero image — the main photo shown in lists, pickers, and reports across the workspace. When a style is created from a tech pack, you pick the hero on the review screen; the largest image on the first page of the pack is proposed. When a style is created another way, upload the hero from the style detail. The existing thumbnail behavior described underStyle thumbnail below is
the same field.
Dependencies
- A Customer record — optional, but typically set on create so the style carries the buyer it was developed for.
- An — optional; only needed when you create the style from an order context.
- A tenant-level numbering scheme for style numbers — administrators configure this when the tenant is set up.
What depends on it
- BOM versions for the style.
- Cost-sheet versions for the style.
- Tech-pack files and other production artifacts (manufacturing orders, packing, QC, cost analysis) attached to the style.
- Every order that runs the style — and through those orders, the manufacturing orders, factory orders, purchase orders, samples, fittings, shipments, and invoices that reference it.
- The resolves the BOM and cost-sheet versions through the style.
Fields
Identity
Style number— the style’s unique identifier in your tenant. It is assigned by the platform on create, using your tenant’s configured numbering scheme, and it cannot be edited afterward. Use it to find and reference the style across the system.
Commercial
Style name— the design’s name. Required.Customer style no.— the buyer’s own style number for the design. Optional.Customer style name— the buyer’s own name for the design. Optional.Season— the selling season the design is developed for. Optional; chosen from your tenant’s configured list.Gender— the audience the design is cut for. Optional; chosen from your tenant’s configured list.Colorway(legacy free-text label) — an optional free-text colorway label kept for backward compatibility. The structured colorway list (below), filled in from the tenant colour palette, is what the BOM and order line-ups read.
Customer style no. and Customer style name are stored in uppercase —
the form upper-cases what you type so the values line up consistently
across the system.Customer
Customer— the brand or buyer the design was developed for. Optional; chosen from your customer records. When you link a customer, the customer’s name is captured on the style and stays visible on the style row, picker lists, and reports — even if the customer record is later removed. See “Effect of changes” for the unlink behavior.
Order link
Order— an optional link to an order, used when you create the style from inside an order. Setting it on create adds the style to that order’s style line-up so the order team can fill in colors, sizes, and quantities. The order link is captured on the style for reference; the order itself remains the place those line-up details live.
Visual
Style thumbnail— the small image used to identify the style in lists and pickers. Accepted formats: JPG, PNG, TIF; up to 25 MB. A TIF upload is converted to a PNG preview when it lands so the browser can render it everywhere the thumbnail appears; JPG and PNG uploads are kept as they are.
Colorways (structured)
A style carries a structured list of colorways. Each colorway has a name, an optional code, a hex value, an optional Pantone reference, a display order, and an optional per-colorway thumbnail. The BOM and order line-ups read from this list, so adding colorways here makes them available downstream. You set the colorways on the Create style form using the Colorways picker, which shows your tenant’s shared colour palette as chips: pick the ones the design will run in, or use the inline + Add colour affordance to add a new colour to the palette and select it on the style in one motion. Picking from the palette keeps “Navy” and “Navy” the same colour across every style and order that names it. After the style is created, the Colorways card on the style detail page is the editor for the structured list. That card carries the per-colorway detail the palette does not — hex, Pantone, display order, and the per-colorway thumbnail — and takes those fields by hand rather than through the palette picker. Reordering and per-colorway image upload happen here. New colour selection onto the style is done from the palette picker; per-colorway finishing detail is done from the card.Audit
Created,Last updated— set by the system. Shown on the style for reference.
Tabs seeded from a tech pack
When a style is created from a tech pack, three of its tabs carry content the pack contributed:- QC tab — the confirmed from the pack lands here at injection, grouped by category (measurements, construction, labels, packaging, folding, materials). The imported checklist is read-only on the QC tab — the rows are what your reviewer approved, and a second editor is a second place to diverge from them. The rest of the QC record (report uploads, notes, dropdown selections) is edited normally.
- Packing tab — pack pages classified as packaging or folding attach here as page-render images, in a thumbnail gallery you can open at full size.
- Production Notes — pack pages classified as stitching, inside details, design details, fabric map, artwork, or label placement attach here as filename links, each captioned with its section and page number.
Business rules
- A style number is assigned on create and never edited. The platform generates the number when the style is created, so two styles in your tenant can never share one.
- A style number is unique within your tenant.
- A style can exist with or without an order link. Linking is optional. A linked style is still a tenant-level master — no order owns it.
- Creating a style with an order link adds it to that order’s line-up. The order team then fills in the colors, sizes, and quantities for that order. Re-linking the same style to the same order does not add a duplicate line.
- A style is reused across many orders. Each order keeps its own working pin onto the of the style’s BOM, cost sheet, and manufacturing order — so two orders on the same style never disturb each other. See BOM, cost sheet, and artifact versions.
- A linked Customer must belong to your tenant. Same for a linked order.
- The Customer’s name is captured on the style at link time. Renaming the customer record later does not change what shows on the style.
- Cover image format and size are limited. JPG, PNG, or TIF, up to 25 MB.
- Creating, editing, and uploading on a style are restricted. Users with style-management permission perform these actions; reads are open to authenticated users in your tenant.
Validations
There are no further save-time validations on the style row itself, and
no transition validations — a style has no status to transition.
Date logic
A style carries no business dates of its own — no target ship date, no season-start date, no quote date. Only theCreated and
Last updated timestamps — set by the system — are shown on the style.
Dates a reader might think of as belonging to the style actually live
elsewhere and should be read there:
- The order linked to the style carries the customer-facing dates (order date, target ship date, ship date). See Order lifecycle.
- The BOM carries an approval timestamp on each approved version.
- The readiness engine derives milestone dates from the production work in flight.
Status and transitions
A style has no status of its own. Once created, it simply exists. State that a reader might call “the style’s status” lives on its child artifacts and on the linked order:- A BOM version is Draft or Approved. See the BOM page.
- A cost-sheet version is Draft, Partially approved, or Approved. See the Cost Sheet page.
- The order linked to the style follows the order lifecycle.
Calculations
The style record itself has no calculated fields. The style detail page exposes a Cost analysis view that summarizes the current cost-sheet version’s per-piece margin and (when an order is selected) projects it across that order’s ordered quantity for the style. The math lives on the cost sheet — see the Cost Sheet page for the calculation rules.Effect of changes
- Editing a style’s header fields after create. Not exposed. The style’s commercial fields (style name, customer style number and name, season, gender, customer, order link) are effectively fixed at create. Re-uploading the thumbnail is the only post-create edit on the style master.
- Re-uploading the cover image. Replaces the style’s thumbnail going forward. Existing per-order copies of the style keep the thumbnail they had when the order’s line-up was set up.
- Editing the style’s per-order details from an order. The order’s style line-up has its own editor for order-specific fields (style number for that order, fabric composition, sample size, fabric price, finish, gender for that order’s run). Those edits stay on the order; they do not change the style master.
- Switching the current BOM or cost-sheet version on the style. Re-pins the artifact version. When the version is tied to a specific order, that order’s pin advances in lockstep, and downstream readiness gates re-read the new current version. See BOM, cost sheet, and artifact versions.
- Removing the linked Customer record. Clears the Customer link on the style. The customer name captured at create stays visible on the style — intentionally, so the style keeps a readable identity for the buyer it was developed for.
- Deleting the linked order. Clears the order link on the style. The style’s line in that order’s line-up went with the order itself.
Best practices
- Create the style first; link an order to it later. Master-first keeps the design reusable across the orders it will sell across.
- Set the Customer at create. The customer name on the style is captured the moment you link, and it stays visible even if the customer record is later removed — so set the right one up front.
- Pick colorways from the shared palette, not the legacy free-text label. The structured list — filled in from the tenant colour palette — is what the BOM and order line-ups read, and picking from the palette keeps duplicates from drifting into your colour list as styles multiply.
- Upload a clear thumbnail. Lists and pickers across GarmentFlow use it, in your team’s eye-line every day.
- Reorder colorways with intent. The order in the structured list is what the BOM and order line-ups show; put the lead colorway first.
- If you create the style from an order to save a step, remember to finish the order’s line-up details (colors, sizes, quantities) in the order itself — that’s where order-side details live.
Related pages
- The style-centric model
- Style vs. order vs. MO
- BOM, cost sheet, and artifact versions
- BOM
- Cost Sheet
- Orders
- PMS Templates — the workspace’s library of factory Excel templates the Style MO create wizard picks from.
- Tech Packs — the receiving side for a brand’s authored pack; the injection creates a style with its BOM, size specification, images, and QC checklist in one action.
- Import a tech pack — upload, review, confirm, inject.