

What this workflow achieves
You end this workflow with a saved style master that has a tenant-unique style number, a commercial identity (name, , season, gender), a structured colorway list, and a thumbnail. The style is now the canonical home for the design: its , , and other artifacts get built on top of it, and any that sells the design links to it instead of re-creating it.When to use it
- A new apparel design is moving into development and needs a home in the system.
- You are about to start an order for a design that does not yet exist as a style — develop the style first, then link the order to it.
Prerequisites
- A style numbering scheme. Your tenant’s administrator has configured the numbering scheme the platform uses to assign style numbers on create.
- Default season and gender lists. Your tenant’s administrator has configured the lists the create form picks from.
- A Customer record, if you want the style to carry the buyer it was developed for. The customer must exist in your tenant. The Customer link is optional but typically set at create.
- An order record, only if you plan to create the style from inside an order (see the alternative entry point below). The order must exist in your tenant.
Roles involved
Users with style-management permission create styles, add and edit colorways, and upload thumbnails. Anyone authenticated to your tenant can open a saved style and read it.Step-by-step
The canonical path is master-first: create the style on its own, then link it to orders later.- Create the style master. Open the Styles module and start a new style from “Create style”. The platform assigns the style number when you save — you do not type one in. For the canonical path, do not link an order yet. (If you are already inside an order and want to create the style from that context, see Alternative: from an order.)
-
Set the style’s identity. Fill in the style’s commercial fields
on the create form:
Style name— the design’s name. Required.Customer style no.andCustomer style name— the buyer’s own number and name for the design. Optional.SeasonandGender— chosen from your tenant’s configured lists. Optional.Customer— the brand or buyer the design is developed for. Optional, but typically set at create so the style carries its buyer from the start.Style thumbnail— the image that identifies the style across lists and pickers. Optional; JPG, PNG, or TIF, up to 25 MB.
Saving the form creates the style master, with its assigned style number, and opens its detail page.Customer style no.andCustomer style nameare stored in uppercase — the form upper-cases what you type so values line up consistently across the system.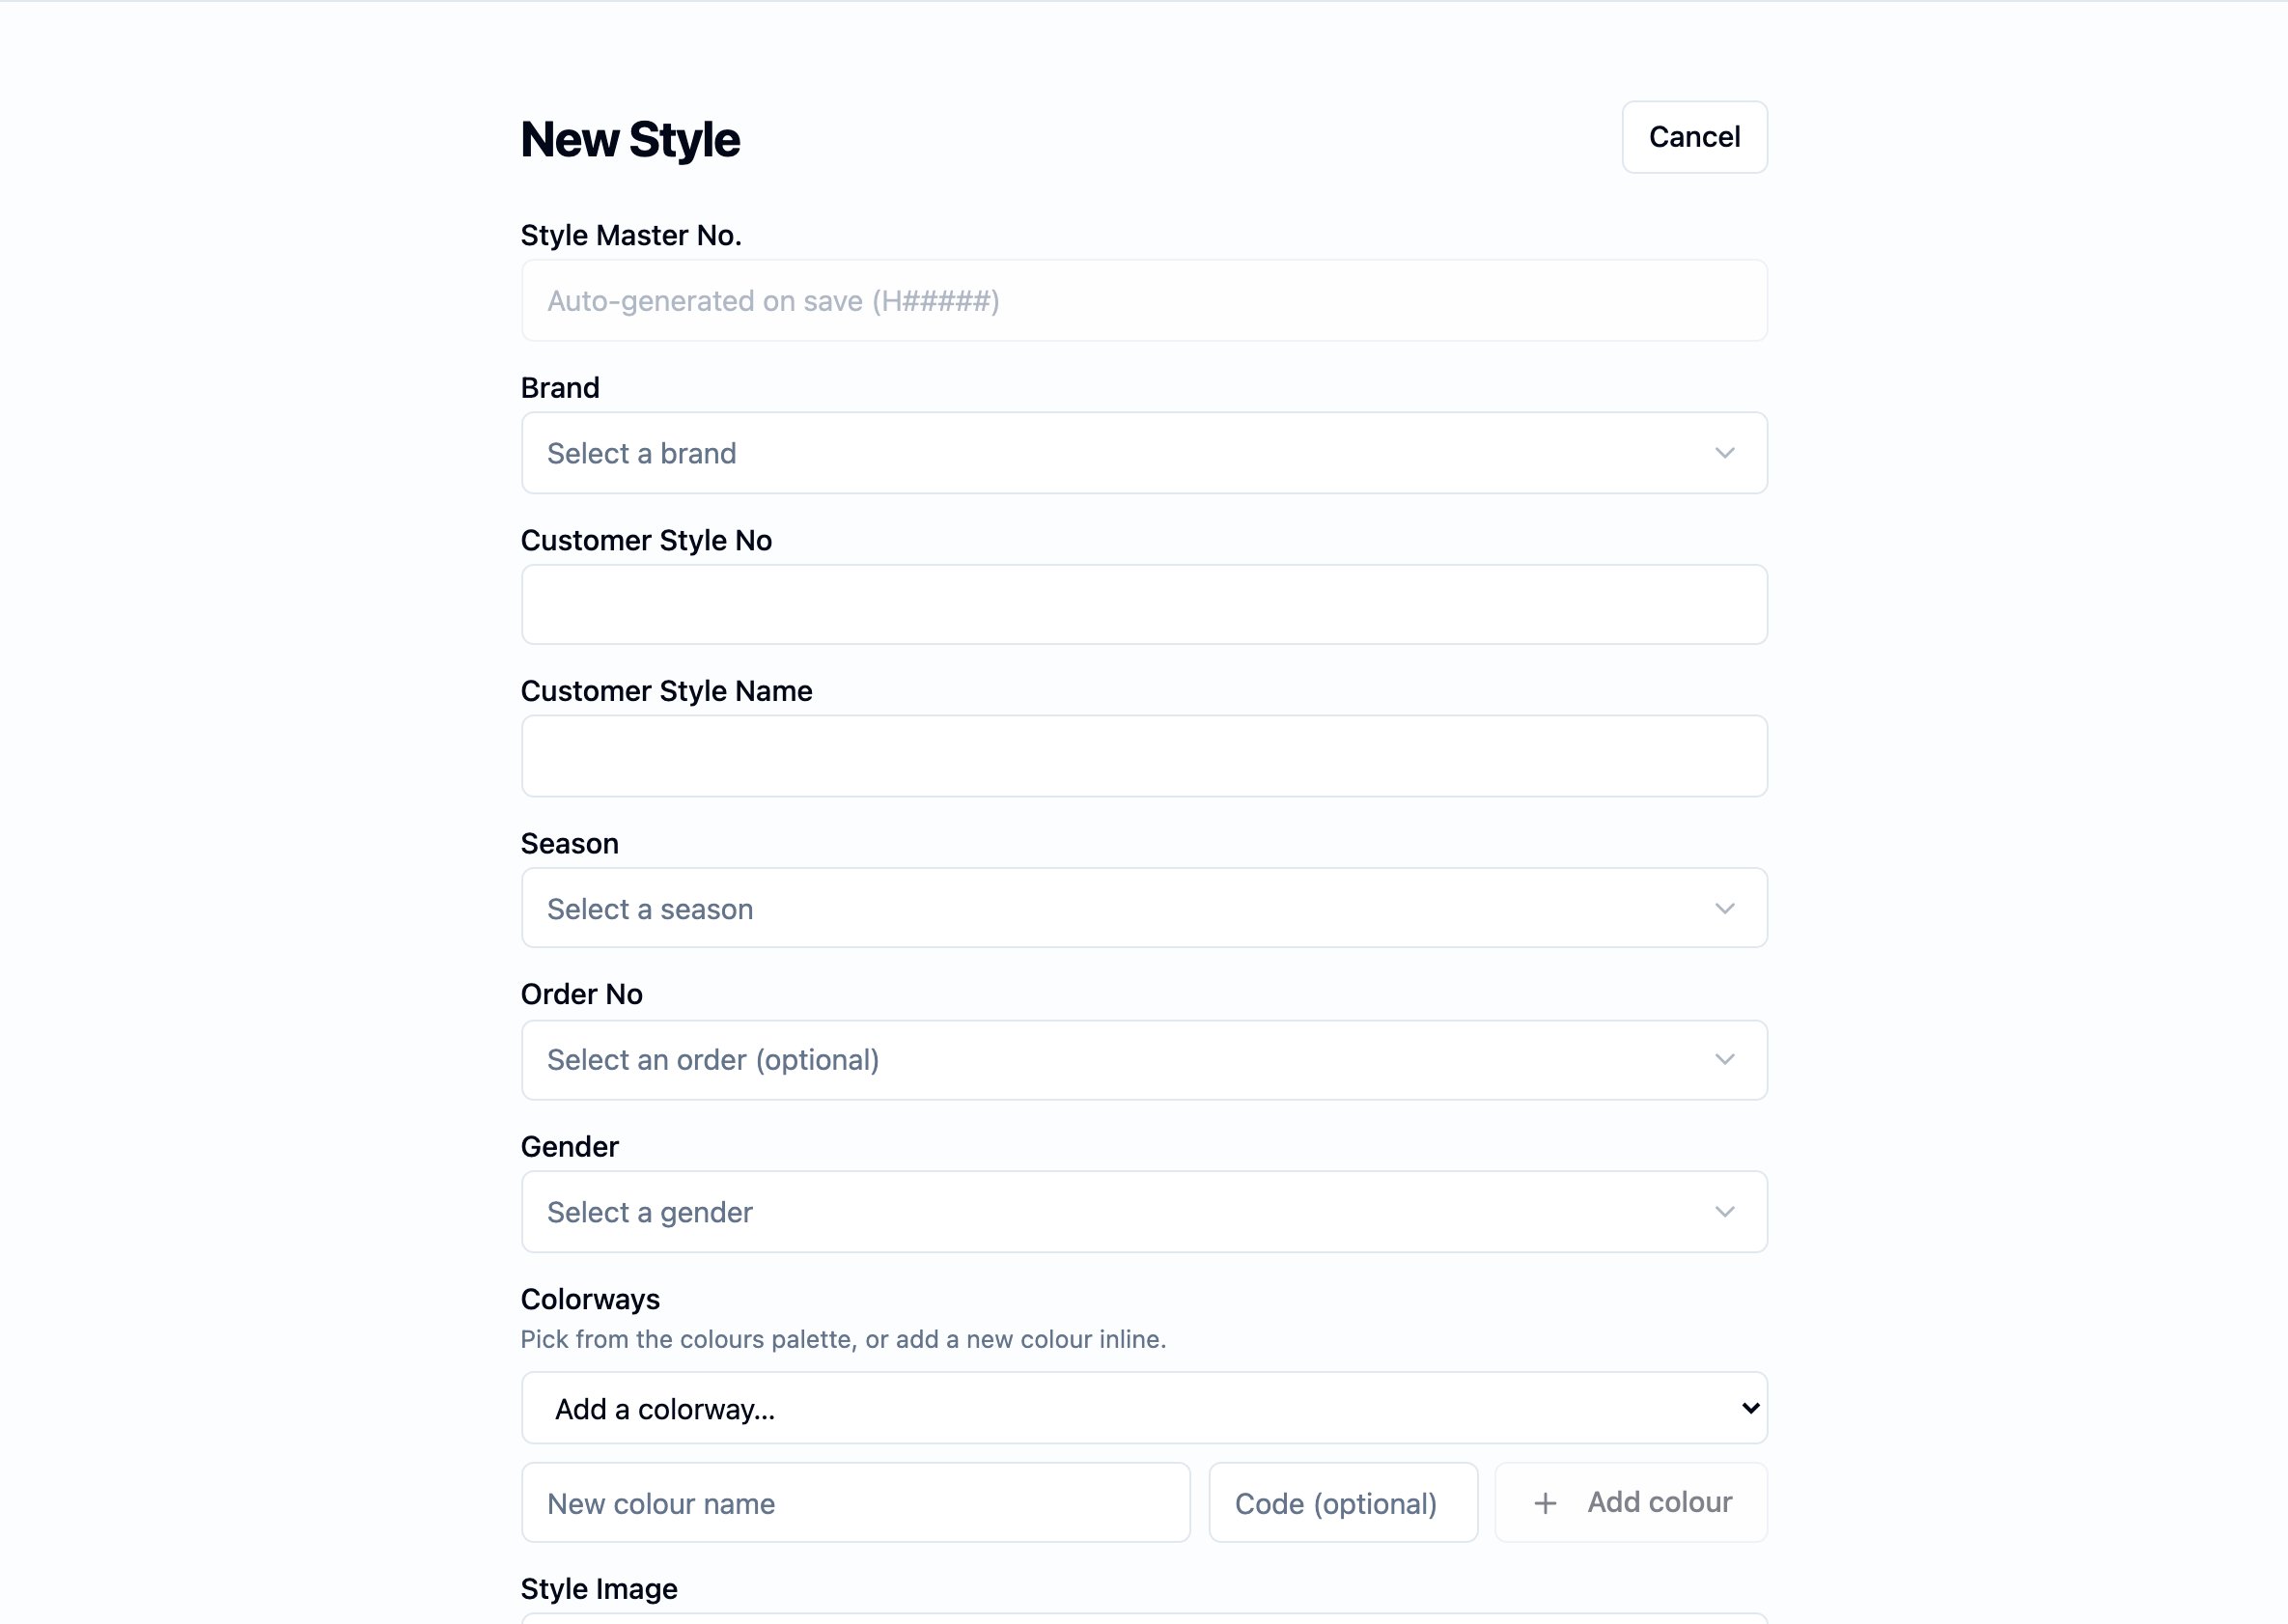
The New Style form — the create surface that covers steps 1 and 2: the style number is auto-assigned on save, and the team fills in the commercial identity (brand, customer style number and name, season, order, gender) and starts the colorway list inline.
- Add the structured colorways. On the saved style, add each the design will be produced in: name, optional code, hex value, optional Pantone reference, and an optional per-colorway thumbnail. Order them as you want them to appear downstream — the BOM and the order line-ups read this list in the order you set.
-
Set up the style’s owned artifacts. The style is now ready for
the artifacts that define how the design is built and costed. They
are owned by the style and built in their own work:
- Build the BOM — the list of fabrics and trims the style is made from.
- Build the cost sheet — the per-piece price build-up the style is quoted and produced against.
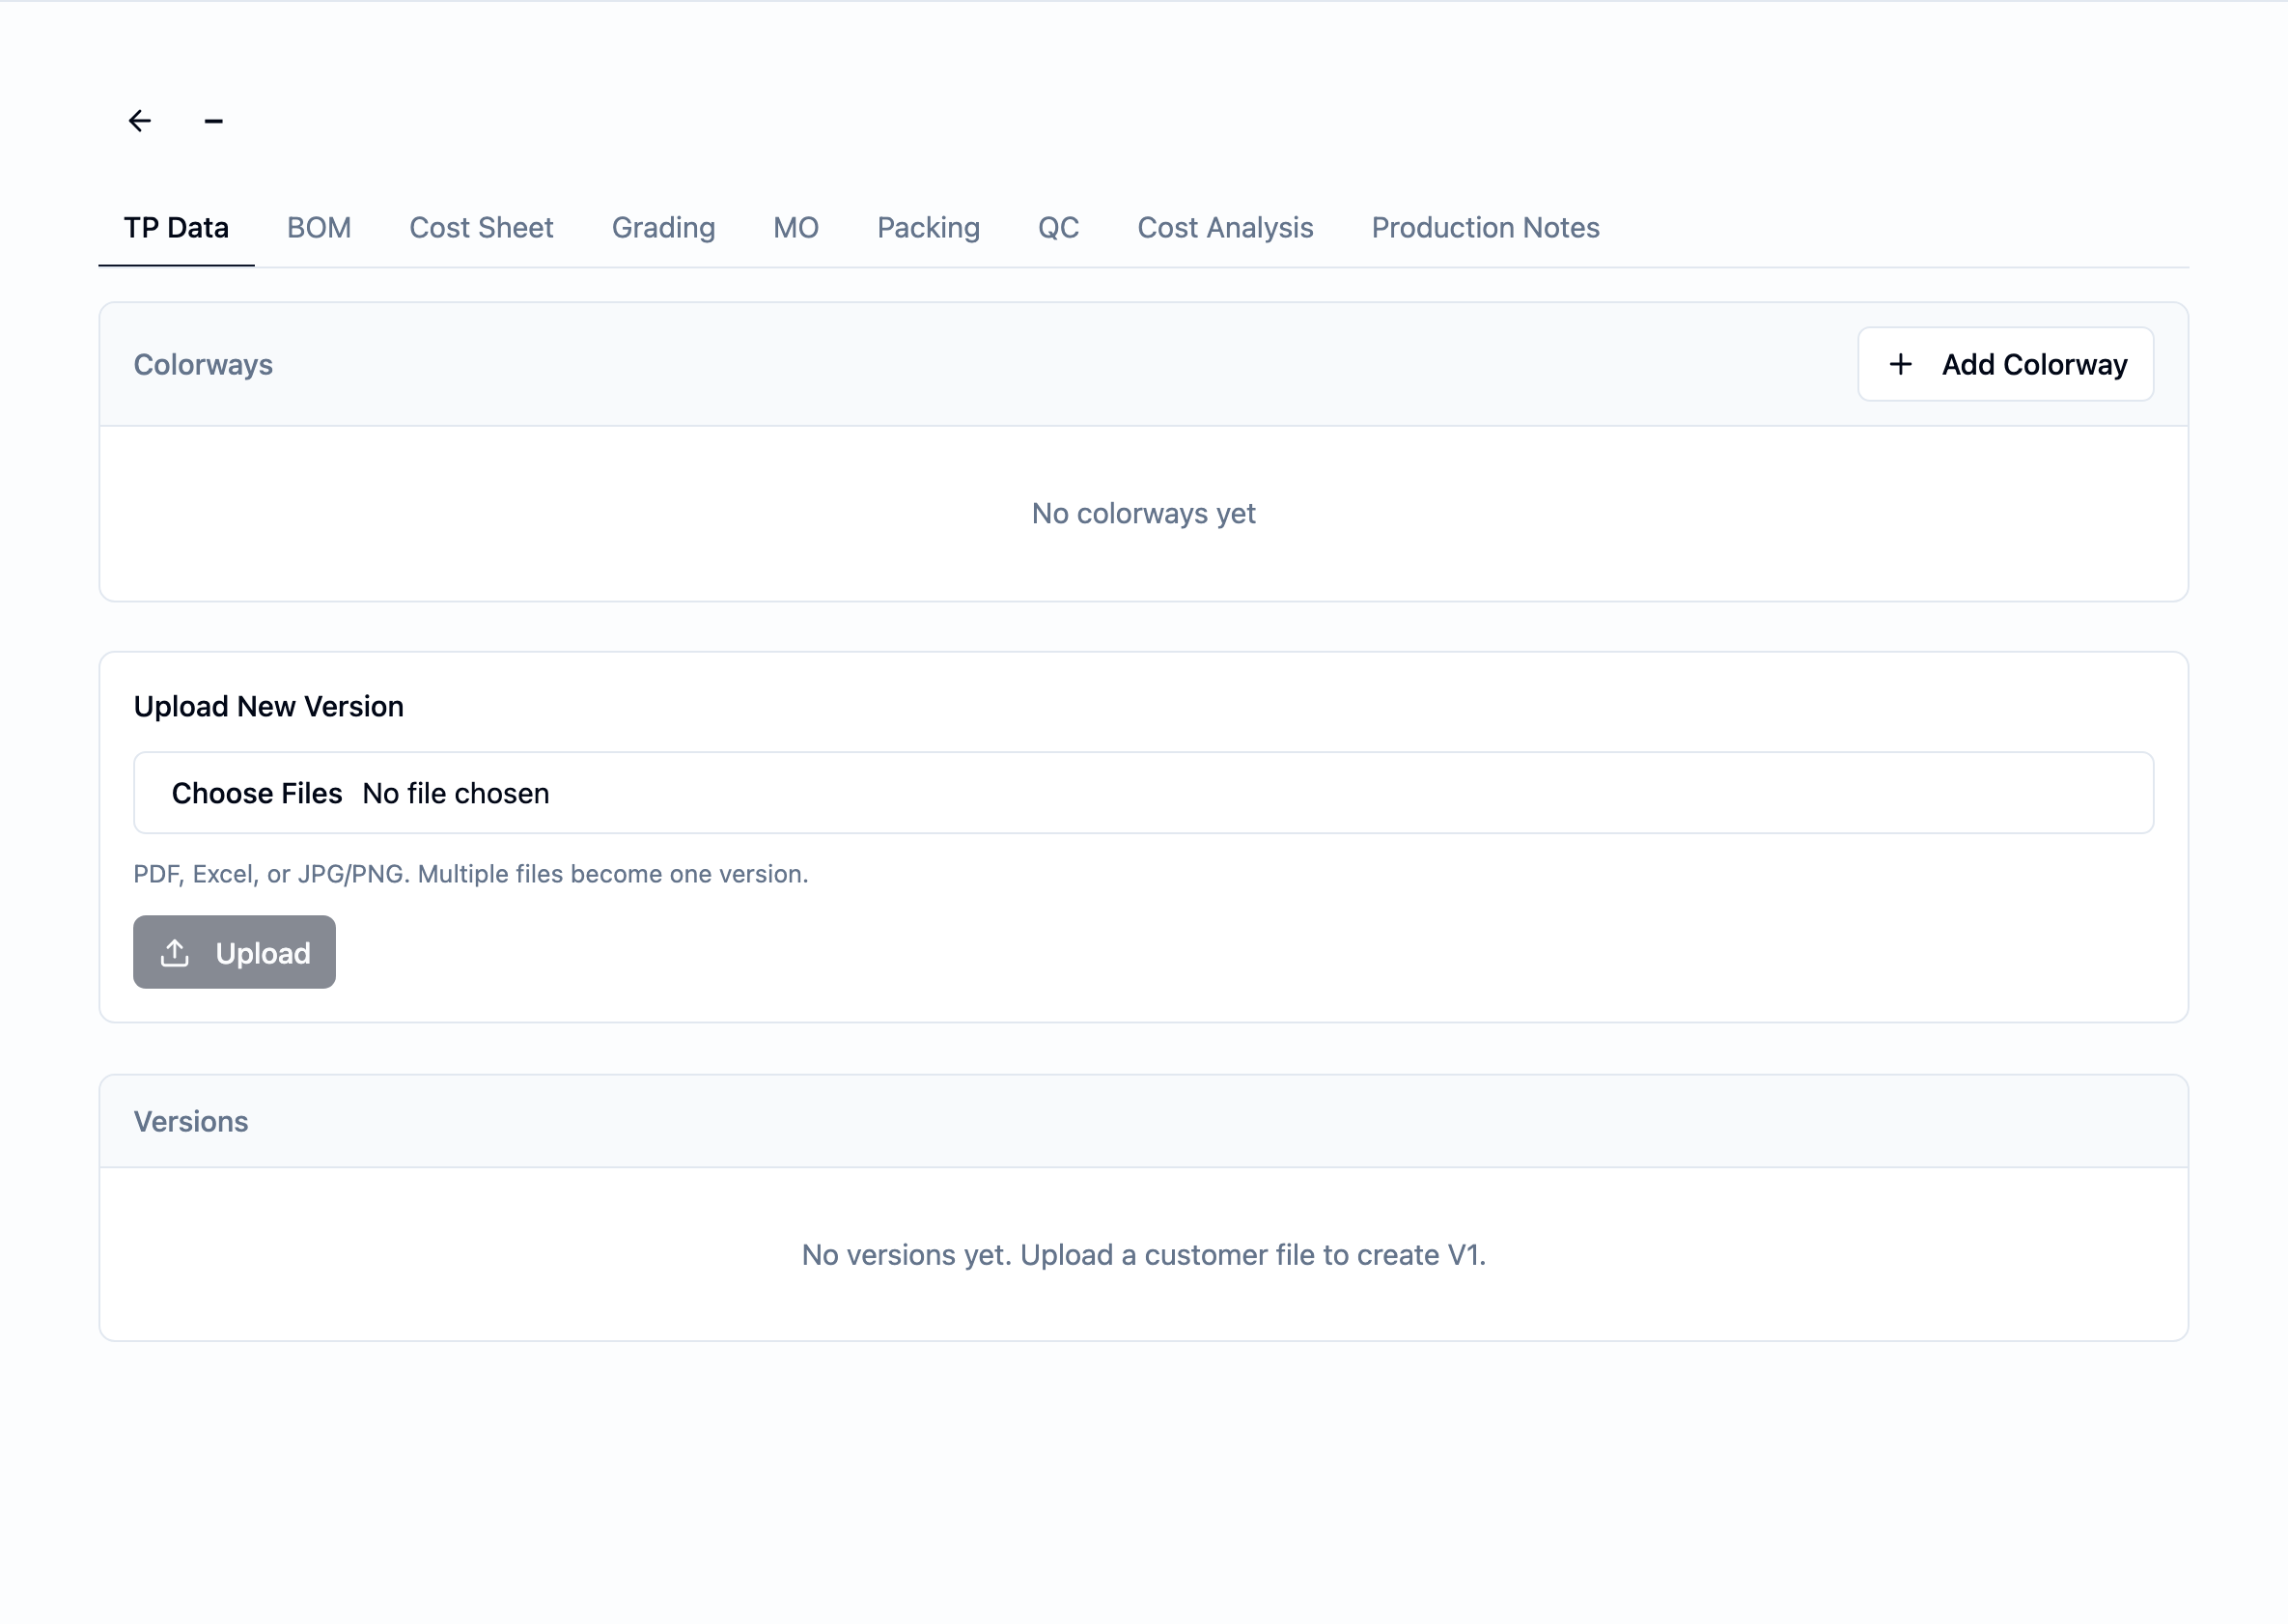
The saved style detail on the TP Data tab — the surface for step 3 (the structured colorway list) and step 4 (the artifact tab strip across the top: BOM, Cost Sheet, Grading, MO, Packing, QC, Cost Analysis).
Alternative: from an order
If you are already inside an order that needs a brand-new design, you can open the create-style form from that order. The form behaves the same — same fields, same numbering, same uppercase rule on the customer style fields — but the order is pre-selected, so saving the style adds it to that order’s style line-up immediately. The order team then fills in the order-specific colors, sizes, and quantities. For the order-side editing, see the Orders module guide. The master-first path is the canonical one. Order-context creation is the alternative entry point for users already in an order, not a different kind of style.Decision points
- Master-first vs. from an order. Create the style first, link an order later, unless you are already working in an order that needs the design. Master-first keeps the style reusable across the orders it will sell across; the order-context path is a shortcut, not a different style.
- Free-text colorway label vs. structured colorways. The style
record carries a legacy free-text
Colorwaylabel, but the BOM and the order line-ups read from the structured colorway list. Build the structured list — that is what downstream uses.
Business rules in play
These rules govern this workflow. They are documented once on the Style page; this workflow only summarizes.- A style number is assigned at create and never edited.
- A style number is unique within your tenant.
- A linked Customer must belong to your tenant. Same for a linked order.
- The Customer’s name is captured on the style at link time and is kept on the style even if the customer record is later removed.
- A style can exist with or without an order link. Linking is optional.
- Creating a style with an order link adds it to that order’s style line-up; re-linking the same style to the same order does not add a duplicate line.
- The thumbnail must be JPG, PNG, or TIF, and 25 MB or smaller.
- Creating, editing colorways on, and uploading to a style are restricted to users with style-management permission.
Dates set or affected
A style carries no business dates of its own — developing one sets no target ship date, no season-start date, no quote date. The only timestamps on the style are the audit timestamps the platform sets when the record is created and updated. Dates a reader will associate with the style live elsewhere and are read there:- The orders linked to the style carry the customer-facing dates (order date, target ship date, ship date). See Order lifecycle.
- The BOM carries an approval timestamp on each approved version.
- The derives milestone dates from the production work in flight.
What happens next
A saved style master is the precondition for the rest of style development. The natural next steps:- Build the BOM for the style.
- Build the cost sheet for the style.
- Link the style into the orders that sell it. One style supports many orders. See Orders.
Best practices
- Create the style first; link an order later. Master-first keeps the design reusable across the orders it will sell across.
- Set the Customer at create. The customer name on the style is captured the moment you link, and it stays visible even if the customer record is later removed — so set the right one up front.
- Build the structured colorway list, not just the free-text label. The BOM and the order line-ups read from the structured list, so the work pays off downstream.
- Put the lead colorway first. The order in the structured list is what the BOM and order line-ups show.
- Upload a clear thumbnail. Lists and pickers across GarmentFlow use it; a clear image makes the design recognizable at a glance.
- If you create the style from an order to save a step, remember to finish the order’s line-up details (colors, sizes, quantities) in the order itself — that is where order-side details live.