

The MO document has two forms. This page walks the eight-tab Excel
workbook, which every MO can produce. When the style originated from a
and the MO is order-bound, a second form is available: the
factory work order (製造單) PDF,
one A4 document that composes the OEM’s cover with the pack’s own pages.
Both read the same confirmed data and can be produced for the same MO.
What this workflow achieves
You end this workflow with an Issued MO whose factory workbook is fully populated across all eight tabs: the order’s per-colorway × per-size quantities, the BOM’s per-colorway color-spec matrix, the finalised grading grid, the sample-stage measurement comparison, and the four customer-authored sheets (packing, production notes, sample review comments, style detail drawings) attached from the customer’s brand-tab library. The factory opens one file and sees the picture the team stands behind.When to use it
- An order’s style is ready for production and the factory needs the spec workbook for the run.
- An earlier MO needs to be re-issued because an upstream record has changed — the BOM was reapproved, the grading was re-finalised, a brand-tab library item was refreshed — and a new MO version needs to pick the change up.
Prerequisites
- A style with its customer style number, brand/customer, season, and structured colorway list. The colorway list’s order sets the BOM tab’s color-column order.
- An order the style is on, with the per-colorway × per-size
Qtygrid,Delivery date, andFactoryfilled. The MO wizard requires selecting an order when the style has one or more orders. - A PMS template in the workspace’s library, with the multi-tab workbook uploaded and its sheet-name mapping maintained.
- MO write permission for the user creating the version. Reads are open to any authenticated user in your tenant.
Roles involved
Users with MO write permission create MO versions, bind the order, attach brand-tab library items to their target sheets, and issue. Administrators and merchandisers maintain the workspace’s PMS templates and the sheet-name mapping the workbook is filled against. Anyone authenticated to your tenant can open the MO panel, read the bound versions, and download the Excel from an issued version.The MO workbook — eight tabs, one source each
The workbook has eight tabs. Every tab carries a header block at the top:Brand, Style no., Style name, Date, Season,
Factory, Delivery date, and Total qty — fed by the style and
the order the MO is bound to. Below the header, each tab’s body is
rendered from a distinct source record:
A tab whose source is missing renders the header block and nothing
else — never an error. This is the workbook’s self-diagnosis mechanic:
each blank body traces back to the one upstream record above it.
Step-by-step
The seven inputs below can be worked in any order — the MO create step is the last one, and it is the one that binds the others into the issued workbook. Get the inputs right first, then create the version.1. Set the style’s identity and colorways
What to complete. On the style, set theCustomer style no.,
Brand (customer), Season, and the structured Colorway list.
Order the colorways as you want them to appear on the BOM tab — the
BOM’s per-colorway color columns are rendered in the style’s colorway
order.
Where in the app. The Styles module → the style → the style
header and the Colorways card. See
Develop a style.
Why the MO needs it. The header block on every workbook tab
reads Brand, Style no., Style name, and Season from the
style. The BOM tab’s color-column layout follows the colorway order.
2. Add the style to the order and fill the size grid
What to complete. Add the style to the order, pick its colorways, apply a size template, and enter the per-colorway × per-sizeQty. Set the order’s Delivery date and Factory.
Where in the app. The order detail’s Style & Spec tab → the
style line → the colorway’s size grid. See
Create an order.
Why the MO needs it. The Order-quantities tab renders from this
grid, and the workbook’s Total qty, Delivery date, and Factory
header fields all read from the bound order.

The order's Style & Spec tab — the line-up where each style's per-colorway × per-size size grid is entered. The MO's Order-quantities tab reads directly from this grid; a colorway left at 0 leaves the tab body empty.
3. Approve the BOM with per-colorway color fields
What to complete. Open the style’s BOM, add the material lines (Item, Description, Unit, Vendor), fill the per-colorway
color fields on each line, and approve the version.
Where in the app. The style detail’s BOM tab → the version
selector → fill the lines → “Approve”. See
Build the BOM.
Why the MO needs it. The BOM tab is a per-colorway color-spec
matrix — one row per material line, one column per colorway, filled
with the color the line runs in for that colorway. The MO does not
render Qty/pc or cost on the BOM tab; the tab is a color-spec
reference for the factory, not a costing view. A Draft BOM
renders no rows on the tab.
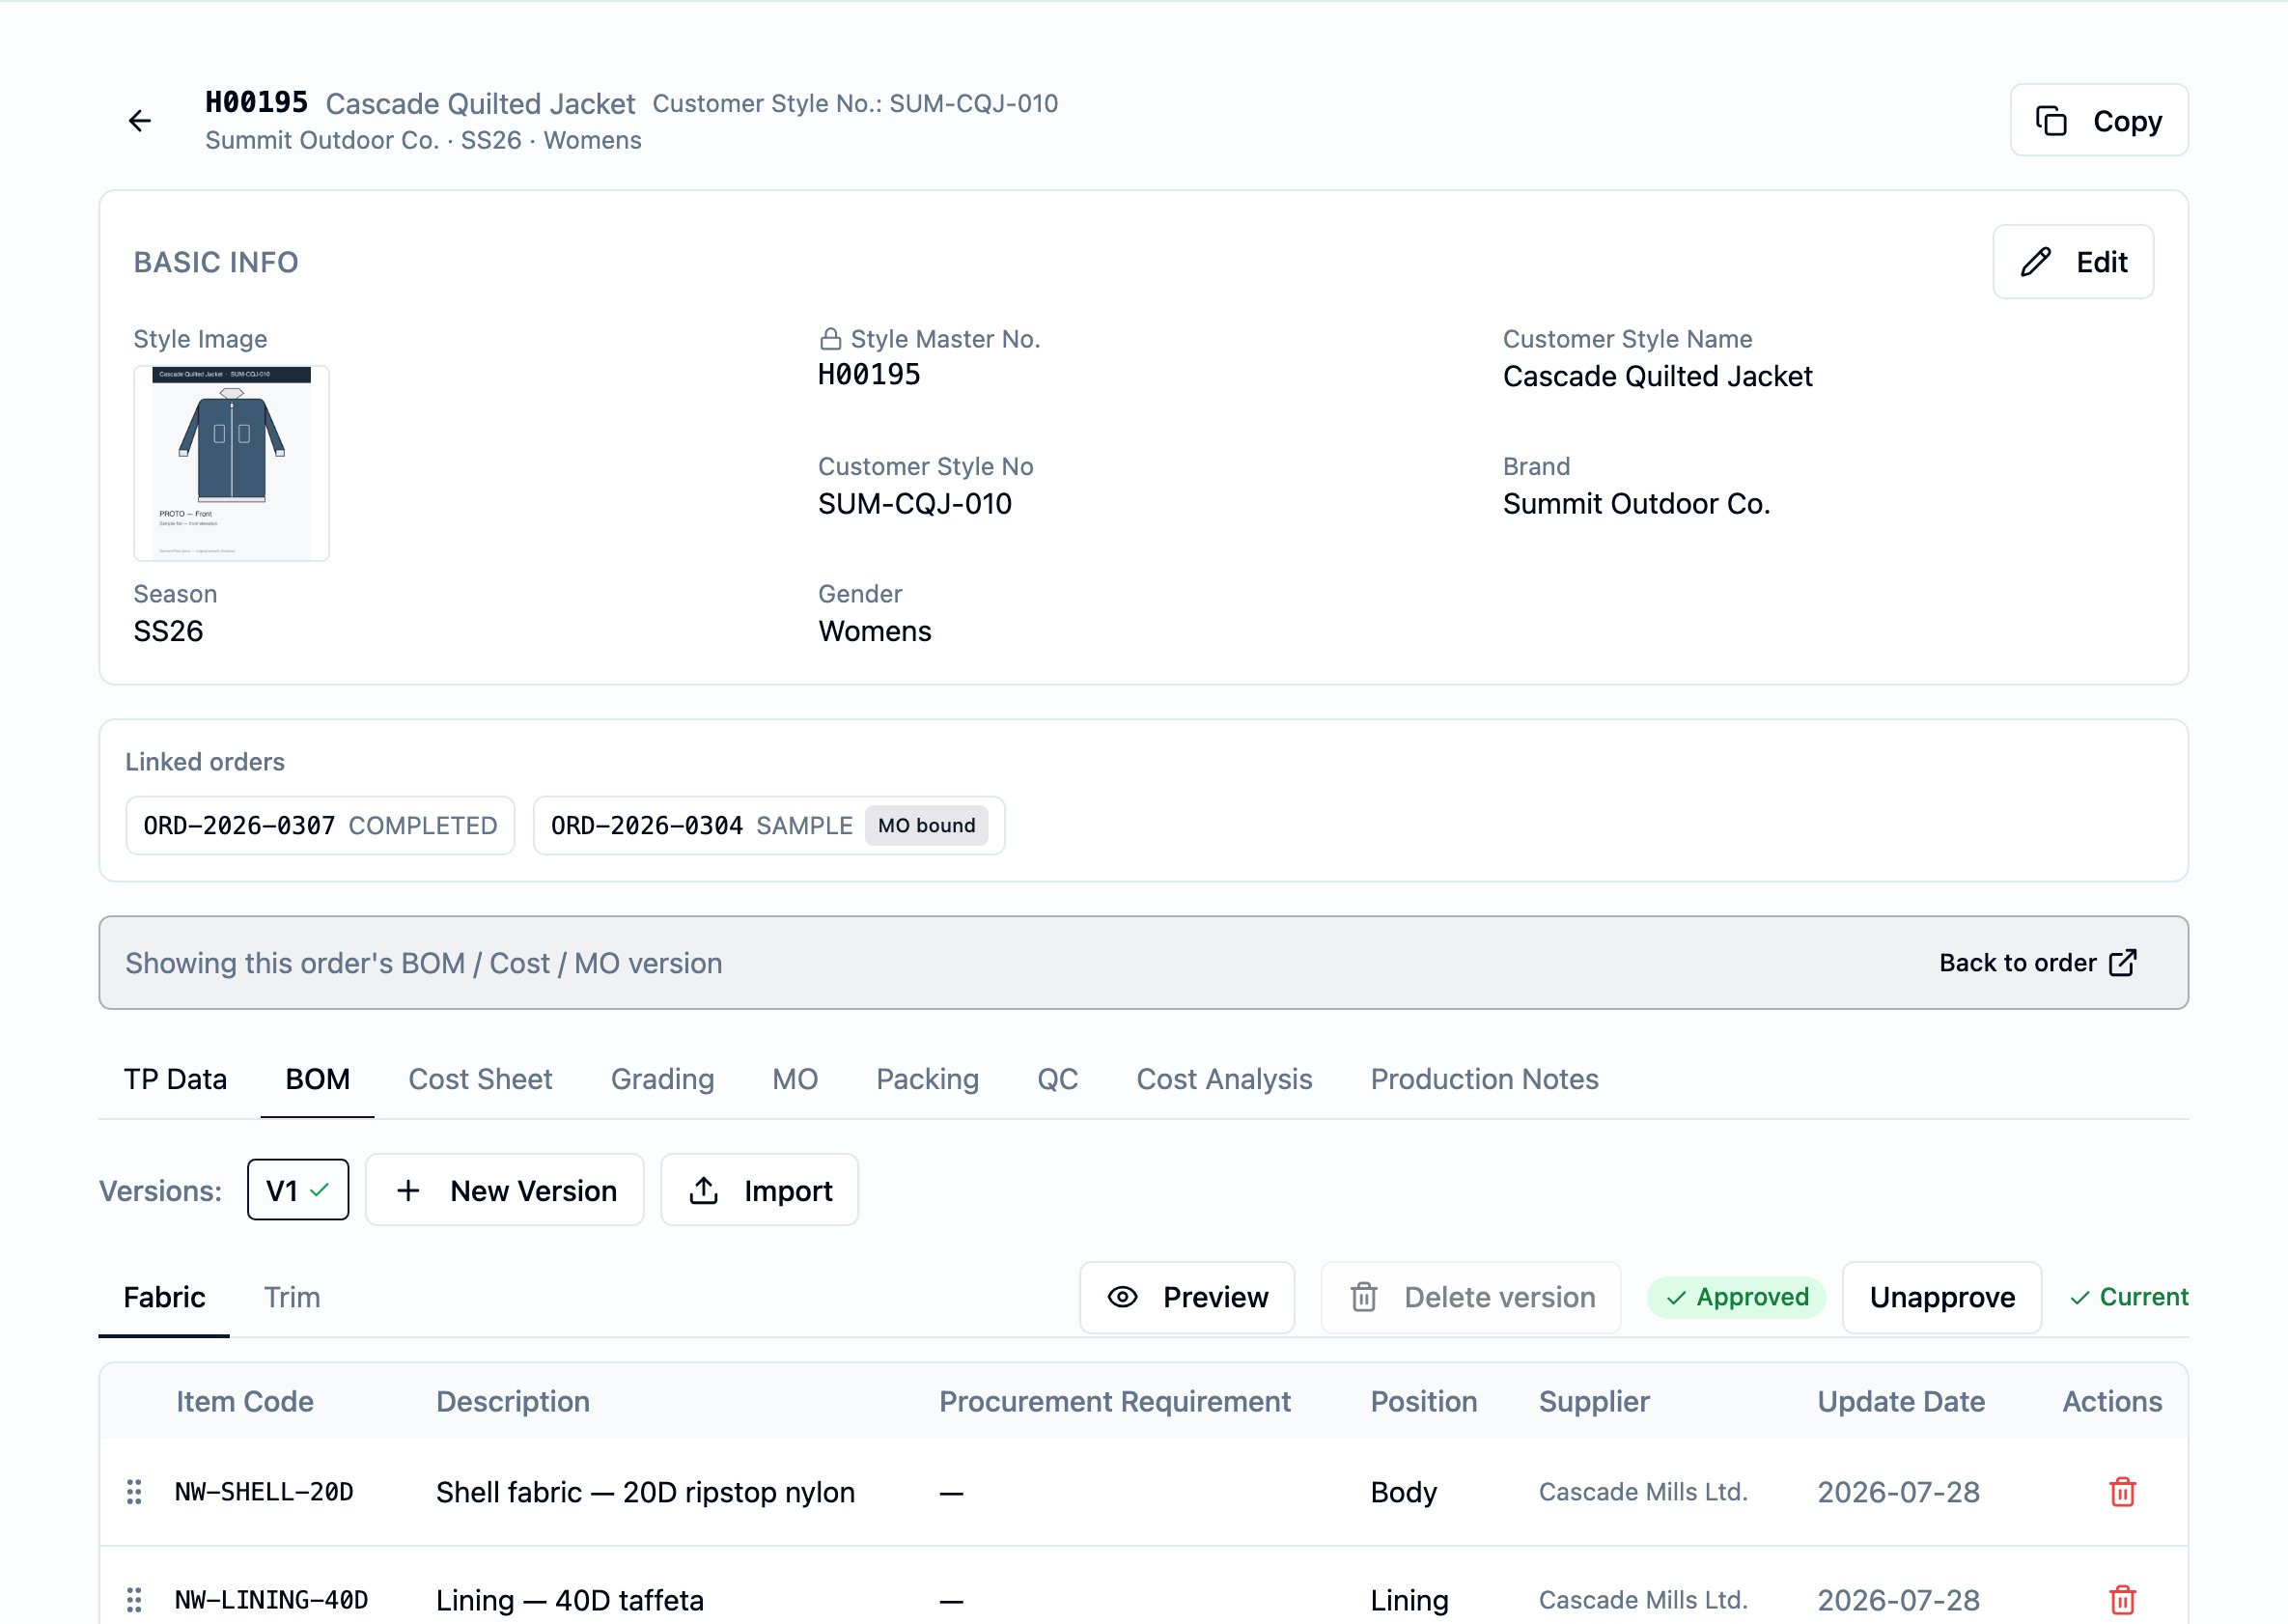
An approved BOM version — the Approved pill and Current label are what release the BOM lines to the MO's BOM tab. A Draft version renders no rows on the tab even if the BOM detail looks complete.
4. Finalise the grading table
What to complete. Open the order-style’s grading and Finalise the version the factory should grade to. A Draft version does not bind to the MO. Where in the app. The order detail’s Grading sub-tab → the version that holds the target measurements → “Finalise”. See Grading. Why the MO needs it. The workbook’s Grading tab renders the POM × size grid with tolerance from the Finalised grading table for that order-style. Grading is per order-style — a table finalised on one order does not carry to another order running the same style.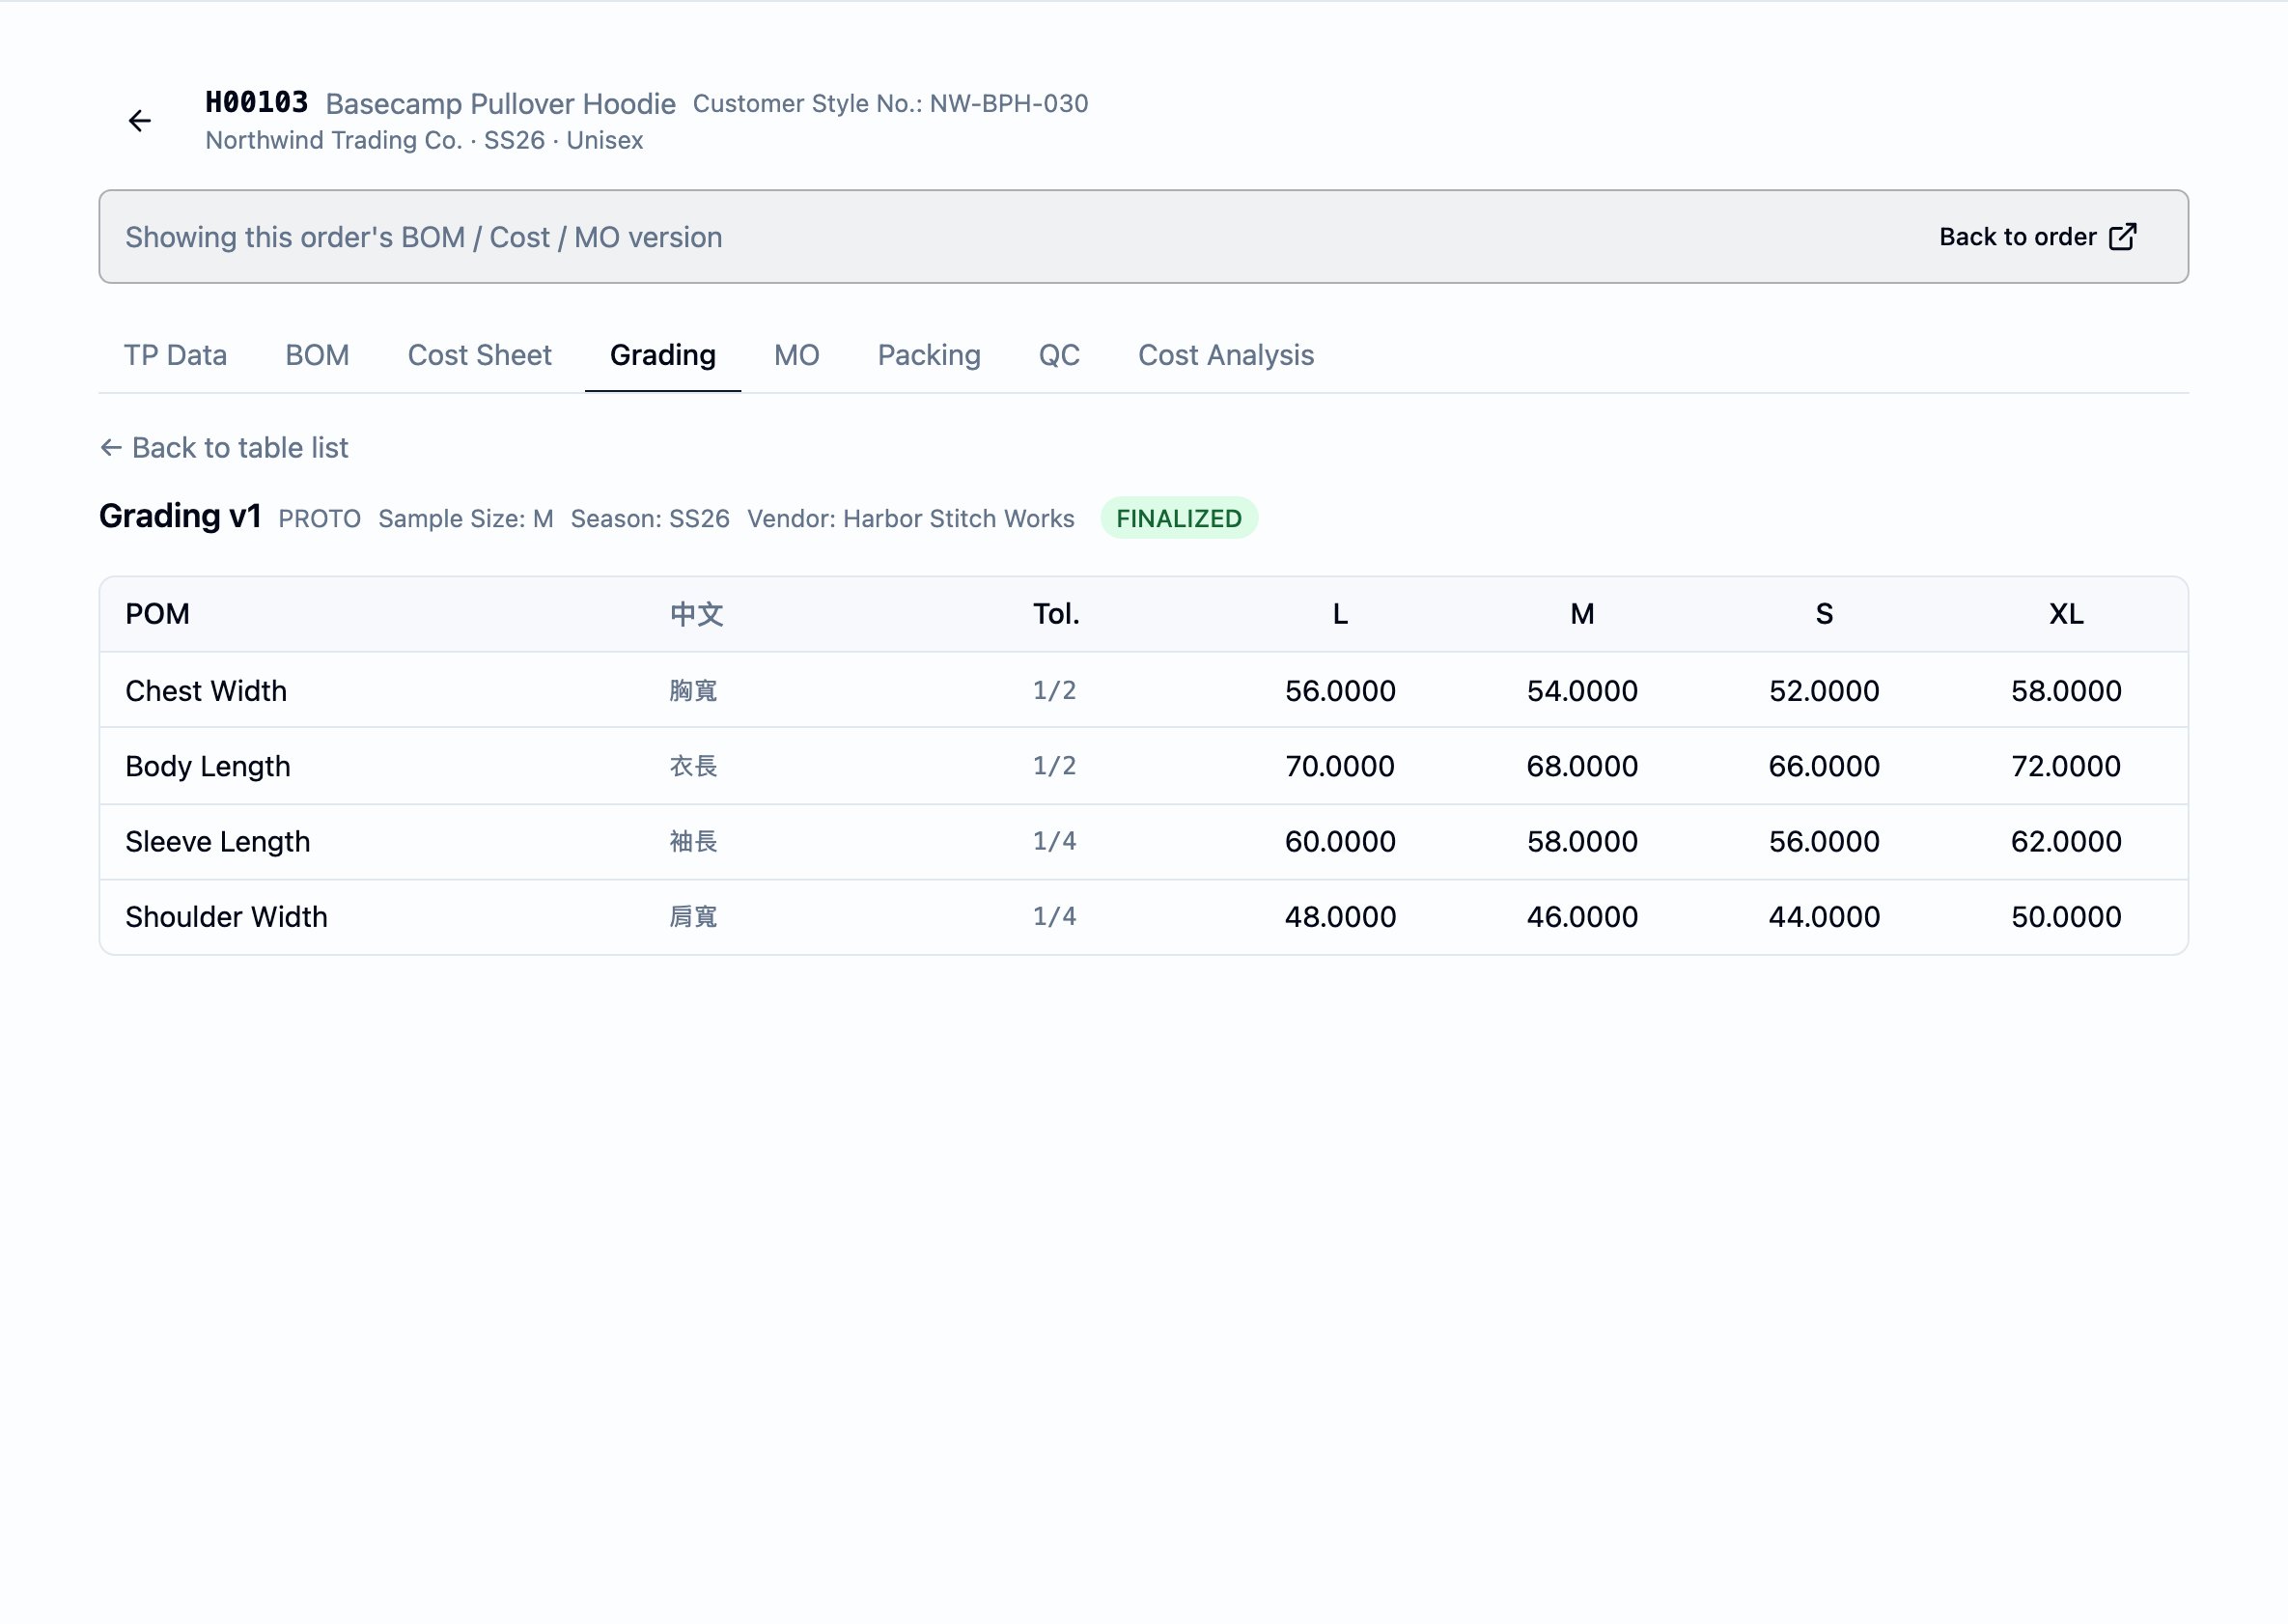
A finalised grading table — POM rows × size columns with tolerance. The MO's Grading tab renders from the finalised version; a draft version leaves the tab body empty.
5. Record the sample measurements
What to complete. On the linked sample, record the measurements taken at each stage the workbook should compare (Proto, Fit 1, Fit 2, Fit 3, Size Set, PP, SMS, Bulk — whichever your team runs). Where in the app. The Fitting module → the sample → the stage tabs → each stage’s measurement fields. See Samples and fitting. Why the MO needs it. The Sample-measurement comparison (Spec) tab is rendered from the per-stage measurements recorded on the sample. A stage with no measurements produces no column for that stage on the comparison; a sample with no stage measurements at all leaves the tab body empty.6. Upload the customer’s brand-tab library
What to complete. On the customer detail page, open the Brand tabs section and upload one or more Excel files containing the customer-authored sheets the MO should attach — packing, production notes, sample review comments, and style detail drawings. An Excel file may contain one such sheet or several. Where in the app. The customer detail page → Brand tabs → Upload. Why the MO needs it. Four of the workbook’s tabs — Packing, Production notes, Sample review, Style detail — are filled by attaching a brand-tab library item to the MO. The item’s source sheet is copied into the target tab in the workbook. A tab with no attachment renders header only.7. Create the MO version and issue
- Open the style’s MO tab in the order context. Open the order, the style line, then the MO tab. The version list shows every MO version opened for this order-style, newest first.
-
Open a new MO version. Start a new version and walk the
wizard:
- Pick a PMS template — the multi-tab workbook the file is rendered from.
- Select the order. The wizard requires selecting the order when the style has one or more orders. A style with no order shows an explicit empty-MO warning — the version can still be opened, but it will render header-only across every data-driven tab because the order fields have no source.
- Attach brand-tab library items. For each of the Packing, Production notes, Sample review, and Style detail targets, pick the brand-tab library item whose sheet the workbook should copy in. Leave a target empty to skip that tab.
- Set the version label (optional).
- Issue the MO. Click Issue. The MO’s bound content freezes from this point on — a later edit to the BOM, grading, sample measurements, or a brand-tab library item does not flow through to an issued version. Open a new MO version to pick a subsequent change up.
- Download the Excel. From the issued MO, click Download Excel. The workbook the factory opens is rendered from the issue-time snapshot — the picture the team froze.
Known limitation — grading rounds on one tab
Multiple grading rounds as separate dated tabs are not yet supported. The workbook has one fixed Grading tab, and the finalised grading table for the order-style is what renders on it. If your team’s process requires more than one grading round visible in one workbook, the earlier round’s file must travel alongside the MO Excel as a separate attachment for now.Admin configuration — templates and sheet-name mapping
The workspace’s PMS Templates page — reached from Admin & configuration → PMS Templates — is where the team uploads the multi-tab Excel workbook the MO fills against, and maintains the sheet-name mapping the platform uses to route brand-tab and grading content into the workbook. Each mapping row is a pair:- The source sheet name — the title of the sheet inside a brand-tab library Excel (or the workspace’s grading source), typed exactly as it appears, including any leading or trailing spaces.
- The target slot — one of Grading, Sample review, Packing, Production notes, or Style detail.
Decision points
- Open the MO in the order context, not at style level. The MO reads the order-quantities tab and the grading tab through the order context. Opening an MO on a style with no order raises the empty-MO warning and leaves every data-driven tab header-only.
- Attach a brand-tab item vs. leave the tab blank. Attach when the workbook should carry the customer’s authored sheet for that target; leave blank when the run does not need it. A blank target is a design choice, not a defect — the tab renders header only.
- Revise upstream vs. open a new MO version. An issued MO freezes its content. When the BOM, grading, sample measurements, or a brand-tab item changes after issue, open a new MO version so the workbook picks the change up. The earlier issued version stays readable on the version list.
Business rules in play
These rules govern this workflow. They are documented once on the canonical pages; this workflow only summarises.- The MO is owned by the style, scoped to the order. The MO reads the style’s BOM, colorway list, and sample through their records, and the order-style’s grading and order quantities through the order context. See style vs. order vs. MO.
- An MO cannot be created on a style with no order. The wizard requires an order when the style has one or more orders; a style with no order surfaces the empty-MO warning and the version, if opened, renders header-only across every data-driven tab.
- An Issued MO freezes its content. From issue forward, the workbook reads from the issue-time snapshot, not the live records. See BOM, cost sheet, and artifact versions.
- Approval is what makes a BOM render on the MO’s BOM tab. A Draft BOM’s lines do not appear on the tab. See Build the BOM.
- Grading binds only the finalised version. A Draft grading table does not appear on the MO’s Grading tab. See Grading.
- Brand-tab sheet-name matches are exact, whitespace included. A source sheet name that differs from the mapping by so much as a trailing space does not attach; the target tab renders header only. See PMS Templates.
What happens next
- Hand the workbook to the factory. The downloaded Excel is the spec the factory works to. Pair it with the factory order that covers the cut-make-trim contract.
- Open a new MO version when an input moves. A reapproved BOM, a re-finalised grading table, refreshed brand-tab content — any of these warrants a new MO version so the workbook picks the change up. The earlier issued version stays readable.
- Drive the order forward. The order’s work phase advances automatically when the pre-production sample is approved, when the order’s first BOM is approved (procurement), and when a shipment goes in transit (shipped). See the Order lifecycle.
Best practices
- Bind the MO to an order before you do anything else. The header, the Order-quantities tab, the Grading tab, and the Sample-measurement comparison all read through the order context; a style-only MO is header-only across every data-driven tab.
- Order the style’s colorways deliberately. The BOM tab’s per-colorway color columns follow the colorway order — set the order once on the style and the workbook renders the columns the team expects.
- Match brand-tab source sheet names to the mapping character for character. The most common reason a target tab renders header only is a trailing or leading space in the source sheet name. Rename the sheet in Excel and re-upload the brand-tab file.
- Approve upstream, then issue. A Draft BOM, an un-finalised grading table, or an empty brand-tab attachment leaves the matching tab header-only on the issued workbook.
- Open a new MO version rather than editing an issued one. Issued MOs are frozen — the workbook the factory has is fixed. A new version is how a later change reaches the factory.
Related pages
- Style vs. order vs. MO
- BOM, cost sheet, and artifact versions
- Create an order
- Build the BOM
- Grading
- Samples and fitting
- PMS Templates
- Production
- Generate the factory work order — the second form of the MO document, for a tech-pack-originated style on an order-bound MO.